Quick Install Guide - Text & Video Edition
This video will guide you through the installation of Secure Disk for BitLocker. Please note:
Quick Install Guide - Text Version
Overview of CryptoPro Secure Disk
Secure Disk includes 3 different MSI installation packages.
- MSI package for the central administration component
- MSI package client “Secure Disk for BitLocker” for customers using Secure Disk as a BitLocker add-on
- MSI package client “Secure Disk Enterprise” for customers preferring a dedicated AES256 encryption or for clients that do not pass the BitLocker requirements
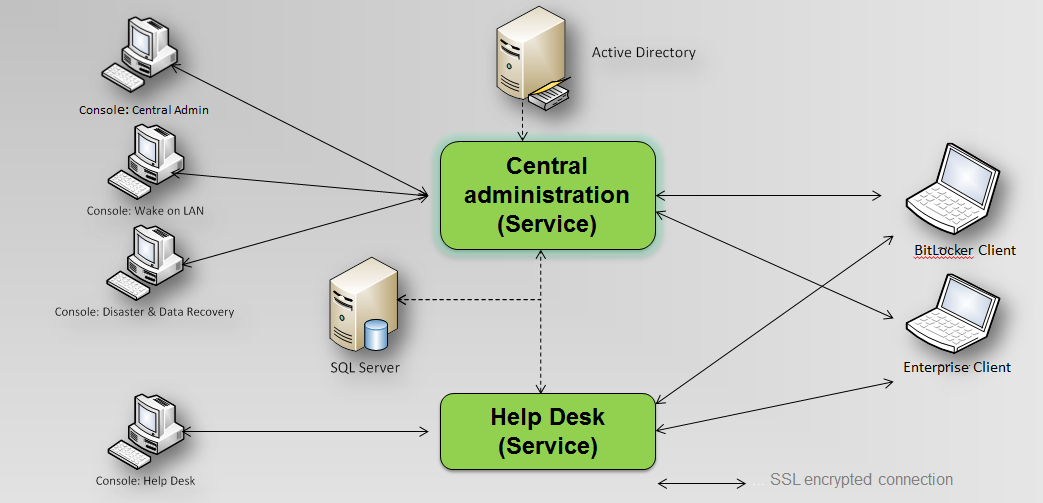
The central administration component of Secure Disk simultaneously serves both clients (BitLocker edition, Enterprise edition). Encryption of the client disk drive, when using Secure Disk for BitLocker, is done by the operating system built-in BitLocker encryption. When using Secure Disk Enterprise, a dedicated AES256 driver is used for encryption.

Figure 1: Overview components
Before you start to install the CryptoPro Secure Disk software, please note the following system requirements.
Client requirements
Secure Disk Enterprise:
- Operating system: Windows 7 (limited support), Windows 8 / 8.1, Windows 10 , Windows 11 (32 or 64 bit)
Secure Disk for BitLocker:
- A BitLocker boot partition must already exist
- Group Policy setting: Computer Configuration -> Administrative Templates -> Windows Components -> Bitlocker Drive Encryption -> Operating System Drives -> Request Additional Authentication at Startup -> Policy “Enabled”; “Allow BitLocker without compatible TPM”
Server requirements
- Operating System: Windows Server 2016 / 2019 / 2022, incl. current updates
- MS SQL Server, with database created for Secure Disk
- Microsoft .NET Framework 4.6.1
Note: Windows SQL Server Express on the same server is possible, but not recommended for environments greater than 5000 clients
If all prerequisites are met on your system, you can begin installing CryptoPro Secure Disk.
Installation of CryptoPro Secure Disk central administration
Start the file EDAAdmin.msi (32-bit server environments) or EDAAdmin_x64.msi (64-bit server environments). The following dialog appears.

Figure 2: Administration Setup Wizard
Click "Next" to proceed with the installation.

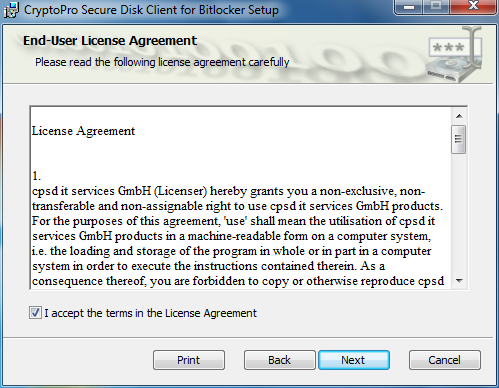
Figure 3: License Agreement
Accept the license agreement to proceed.
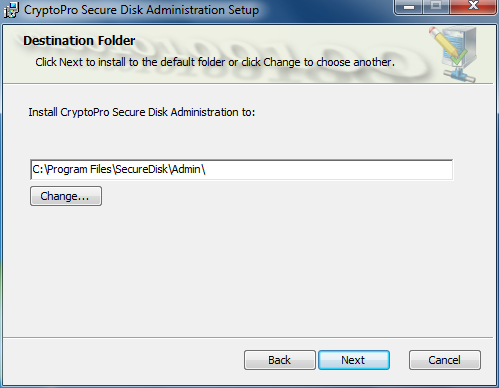
Choose the program install path and press “Next” to continue.

Figure 4: Installation path
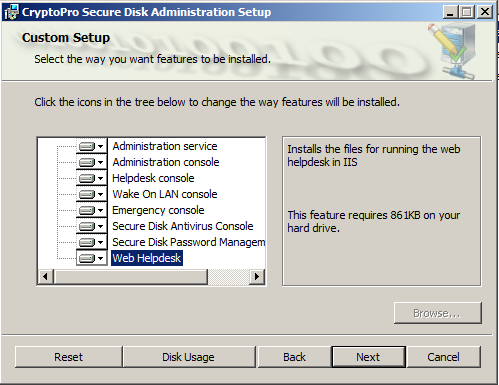
Choose all components and press “Next”.

Figure 5: Components
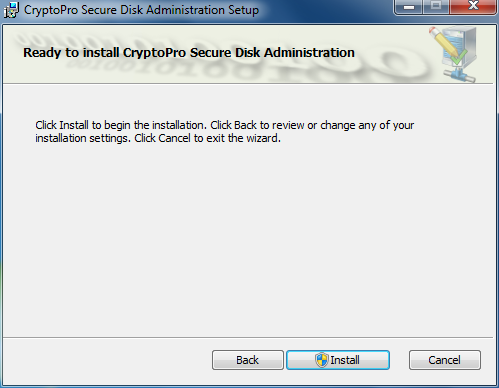
Click “Next” to proceed with the installation.

Figure 6: Start install process
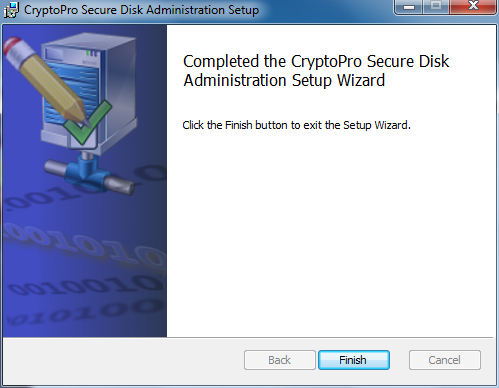
After few seconds you will see the final setup screen.

Figure 7: Setup completed
By pressing “Finish” you finalize the installation process.
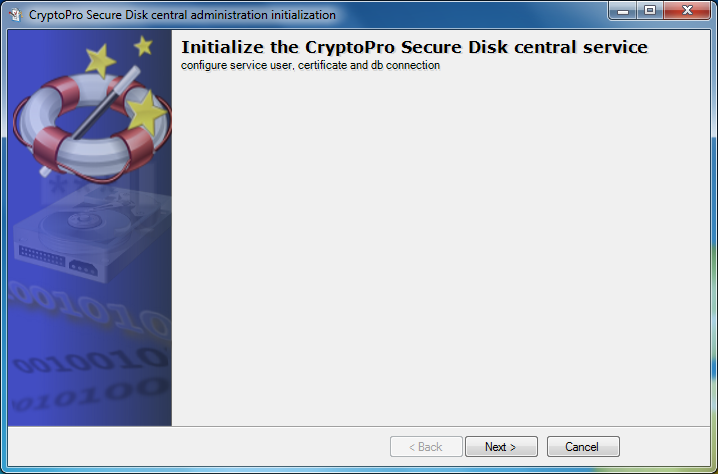
After a few seconds, the initialization dialog starts automatically:

Figure 8: Initialization phase
Press “Next” to continue.
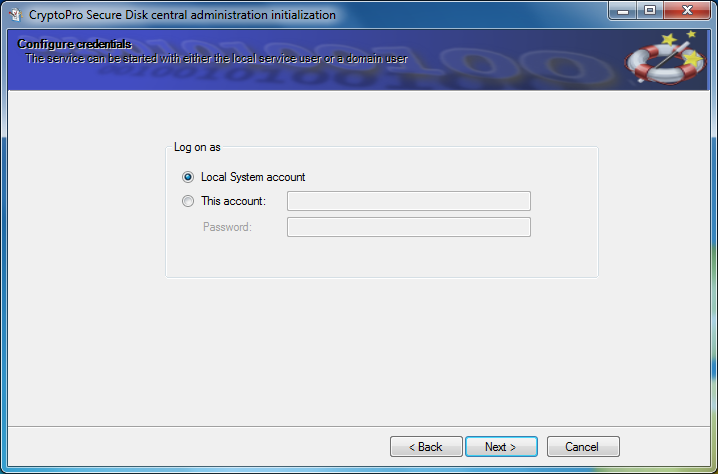
Define the Windows account, under which the central "CryptoPro Secure Disk central service" should run.
Please note that the "CryptoPro Secure Disk Central Service" account mandatory requires read access to the Active Directory (AD).

Figure 9: Define service account
Press “Next” to proceed.

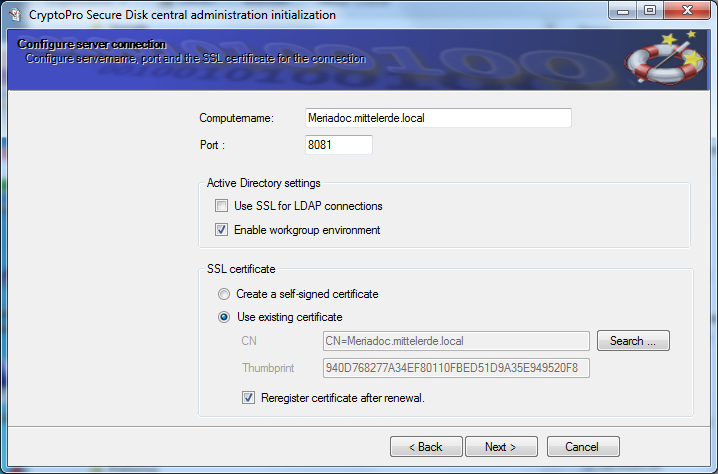
Figure 10: Define secure server connection
Since the complete communication to the central admin service is protected by TLS, the server needs a corresponding SSL certificate. This required self-signed certificate is generated automatically in the background. A company server certificate can be used for productional environments, but typically not required in POC phase. In this dialog, you also may customize the communications port address.
Choose “Create a self-signed certificate” and press “Next” to proceed.
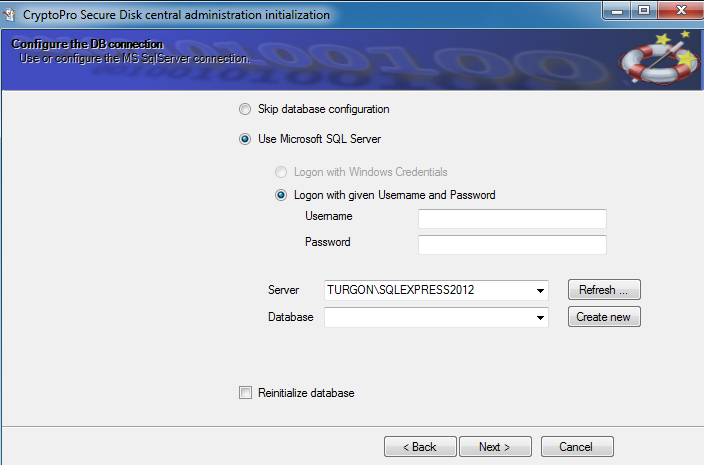
Select the already created SQL server instance and database for Secure Disk and check the corresponding login mechanism (Windows Credential or SQL Credentials)

Figure 11: Configure DB connection
When entering the SQL account data, there are different possibilities.
- Windows permissions: The service account must have “Owner rights” in the database
- Username / Password: Enter SQL user such as user SA and password
- Attention! Do not enter a Windows account here
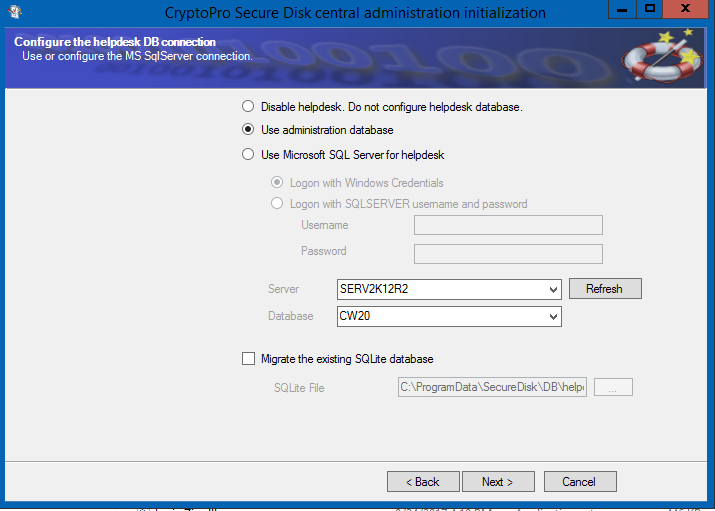
Next you need to define the helpdesk database settings.

Figure 12: Define helpdesk database
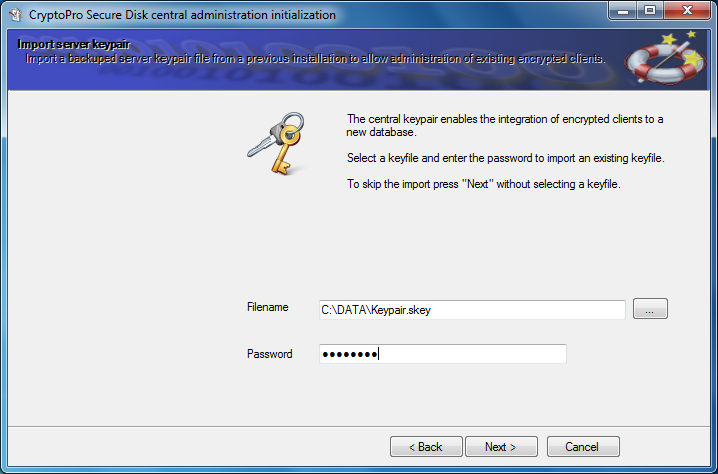
The following screen asks for a previous installation key. For a new installation, this dialog can be skipped with “Next”.

Figure 13: Import server keypair
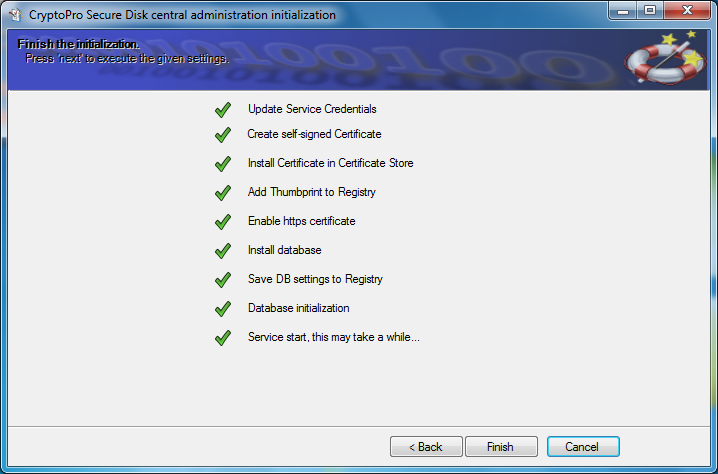
Follow the wizard to complete the initialization.

Figure 14: Installation processes
Basic client configuration of CryptoPro Secure Disk
To configure the basic client settings, start the “Secure Disk Client Management” console from the Windows start menu.
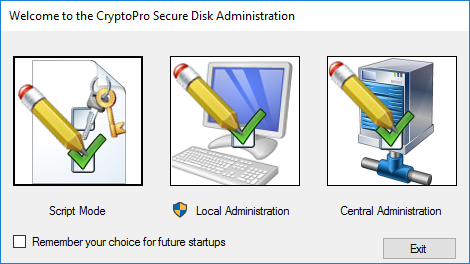
In the following dialog please select the “Central Administration”:

Figure 15: CryptoPro Secure Disk administration methods
This will start the management console for the first time. You will be asked to enter a server name and a communication port. Confirm the settings with “OK”.
After that, define your personal CryptoPro Secure Disk admin password. This password is requested each time the management console is started.

Figure 16: Administration logon
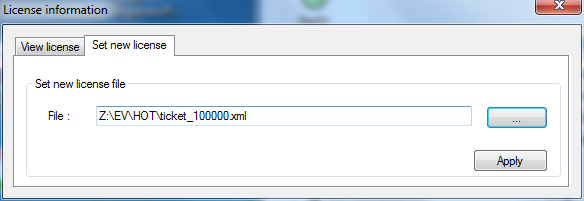
As up to now no license information has been imported, you will be informed and subsequently requested to specify an appropriate license file.

Figure 17: Import license file
Note: To request an evaluation license file, write us with your full business contact details using our contact form.
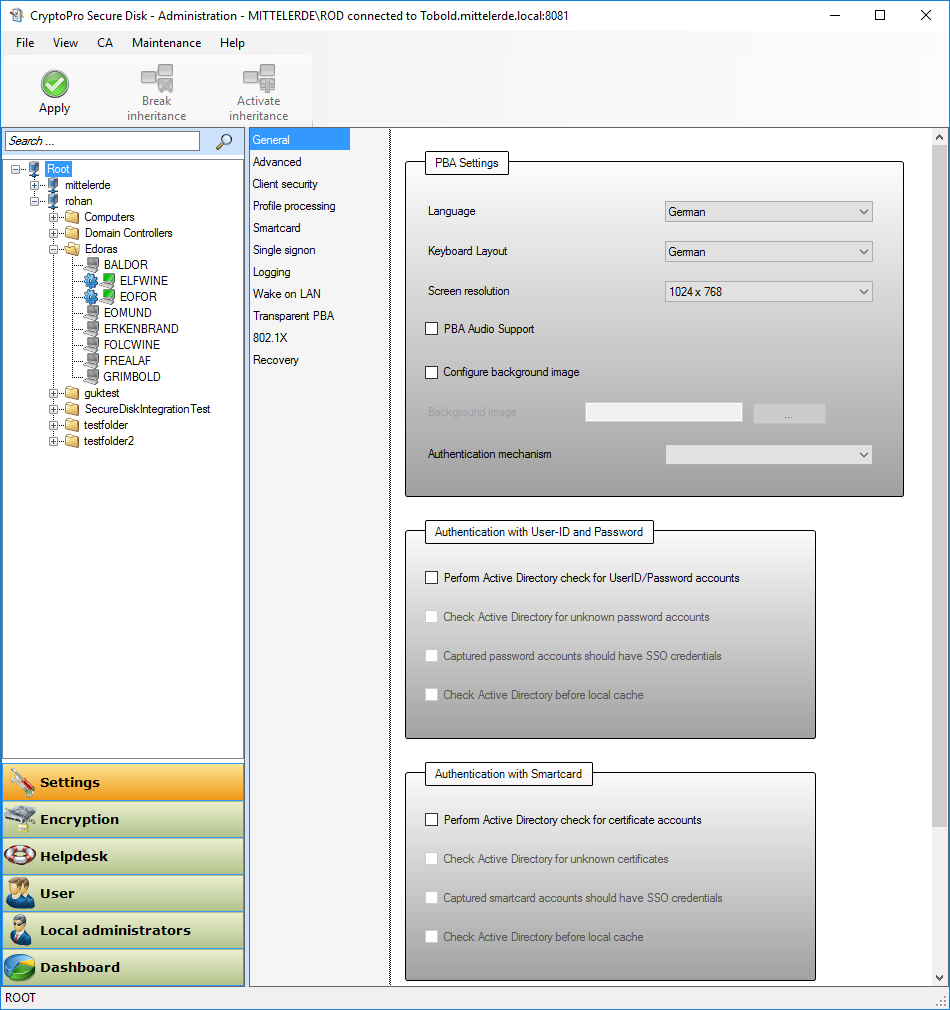
Now you are ready to make the configuration for your clients! For standard settings (user self-init mode), just press the “Apply” button.

Figure 18: Apply standard setting
The standard configuration covers:
- After reboot the next Windows user (logon to Windows) will be captured as standard pre-boot-authentication user for Secure Disk. (Secure Disk feature: “User Self-Init”)
- Password changes in Windows will be synchronized with the credentials in pre-boot phase
- Disk Drives are not encrypted with the standard configuration. Encryption will be activated at a later stage.
Server side installation and configuration is now finished – please continue with the client installation.
Secure Disk Client installation
On the client you want to install the Secure Disk client for disk encryption, start a command shell in the admin context and navigate to the directory in which the client installation package is located:
- For 32-bit Windows OS
- CryptoPro Secure Disk Enterprise: EDAClient.msi
- CryptoPro Secure Disk for BitLocker: EDAClientForBitlocker.msi
- For 64-bit Windows OS
- CryptoPro Secure Disk Enterprise: EDAClient_x64.msi
- CryptoPro Secure Disk for BitLocker: EDAClientForBitlocker_x64.msi
TPM is not required for Secure Disk and will be disabled by default. For this, change your Group Policy prior this installation to:
"Allow BitLocker without a compatible TPM" in Local Computer Policy > Computer Configuration > Administrative Templates > Windows Components > BitLocker Drive Encryption > Operating System Drives > Require additional authentication at startup -> Enable
Start the installation with the following command, but first use PING.EXE to check whether the administration server can be pinged by its FQDN name (FQDN = fully qualified domain name).
Msiexec.exe /I EDAClientForBitlocker_x64.msi CA_SERVERNAME=<FQDN name of the administration server>
Setting | Information | Default Value |
|---|---|---|
CA_SERVERNAME | FQDN name of the server | <none> |
CA_PORT | Communication Port | 8081 |
USE_TPM | Use TPM fpr HD encryption (BitLocker) | 0 |
DELETE_KEY_PROTECTION | Delete existing BitLocker key protection | 1 |
INITIALIZE | Create PBA partition | 1 |
BITLOCKER_TO_GO_COMP | Enhanced BitLocker To Go compatibility | 0 |
INITIALIZE | Hardware profiles hw_profiles.txt | <none> |
Distribution examples for the BitLocker client
msiexec /i EDAClientForBitlocker.msi CA_SERVERNAME=Server.local CA_PORT=8081
msiexec /i EDAClientForBitlocker_x64.msi CA_SERVERNAME=Server1.microsoft.com CA_SERVERPORT=8081 BITLOCKER_TO_GO_COMP=1 HW_PROFILES=hw_profiles.txt /qn+ /log C:\TempSecureDisk_Installation.log
Note: For some antivirus systems, you should enter the "Secure Disk CryptoPro client LocalService" as a trusted program.
After successful installation, the client connects to the specified administration server and retrieves the previously made settings and applies them. The client settings can of course be changed centrally at any time and are synchronized within minutes to network connected clients. After the first reboot, the system is in the so-called "SELFTEST mode". During the next system start the best possible configuration for your system (hardware and chipset support) is determined. This condition can cause the system to hang during the boot process and rarely a manual restart is required.
After finding the proper configuration this "SELFTEST mode" will be deactivated and the determined configuration can be used for further installations as part of a rollout parameter.
In addition, the system is also in "SELFINIT mode" for Windows credentials. This means that the next user who is logging on to Windows will be added as a pre-boot authentication (PBA) user. This user will after adding be able to log on into the Secure Disk PBA with his Windows credentials.
Follow the installation-wizard and press "Next".

Figure 19: Client setup start
Accept the license agreement and press “Next”.

Leave the installation features and press “Next”.

Figure 21: Client feature installation
Define the CryptoPro Secure Disk central management server FQDN and the service port you defined during the configuration of the central service and press “Next”.

Figure 22: Central server configuration
Leave the BitLocker support features as preconfigured and press “Next”. See our manual for more information on the BitLocker support features.

Figure 23: BitLocker support options
Press “Install” to start the client installation.

Figure 24: Client installation
The installation progress will be shown in the progress bar.

Figure 25: Client installation progress
After installation press “Finish” to complete the client setup.

Figure 26: Completed client setup
To activate the pre-boot-authentication system of CryptoPro Secure Disk for BitLocker you need to reboot your client.

Figure 27: Mandatory client reboot
In the Windows notifications of the Secure Disk for BitLocker client you will see if the client receives its policy from the CryptoPro Secure Disk central administration service.

Figure 28: Client notifications
On the next reboot you see the CryptoPro Secure Disk pre-boot-authentication screen. The system will boot to Windows and capture the next user authentication for pre-boot-authentication.

Figure 29: Pre-boot-system with active self-init mode
Logon to Windows as you always do.

Figure 30: User capturing
On the next reboot the captured user credentials will be used for CryptoPro Secure Disk pre-boot-authentication.

Figure 31: Pre-boot authentication with captured user credentials
Activation of Secure Disk Drive Encryption
After complete installation and initialization of CryptoPro Secure Disk client and server, please activate the encryption of disk drive.
- Therefor start the central administration console and press the “Encryption” button.
- Switch from “all plain” to “encrypt all”
- Press “Apply” button

Figure 32: Activate encryption in client setting
After a few minutes your Secure Disk clients will receive the updated setting and will start encryption of the disk drives. Until the encryption is completed the color of the client node will change to red. Successful encrypted and compliant clients will me marked in green color.
Gratulation!
Your Secure Disk server and client installation should be up and running now. There are multiple options and feature you now can evaluate.
This include:
- OTP authentication support
- Smartphone authentication for iOS and Android
- Smart card / X.509 authentication
- Yubikey 5 support
- Multi-user support
- 802.1X authentication support in pre-boot phase
- Online and offline helpdesk support
- Our user convenient network-friendly-mode
- Compliance reports
Do you need help?
That's what our customers encrypted for:
Compliance
How will state-of-the-art security will help your GDPR compliance?
Security
If you skip encryption because of complexity, we have the best solution!
Regain Control
See the top 5 actions how to regain control on your confidential data.